Last Updated: 2025-09-11 11:43:06
 Amazon
 walmart
| Manufacturer | - |
|---|---|
| Brand | Olde World Trading |
| Item model number | PKCORB |
| Color | Black |
| Weight | - |
| Height | - |
| Depth | - |
| Product Id | 304874 |
|---|---|
| User Reviews and Ratings |
3.7
(49 ratings)
3.7 out of 5 stars
|
| UPC | 074804015737 |
| # | Shop & Price | Reviews | User Ratings | Price |
|---|---|---|---|---|
| 1 |
Check on Amazon
Price:
Search
Visit
|
|||
| 2 |
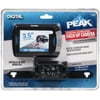
Peak 3-1/2" Car Backup Camera
Reviews: 49
app.ratings:
(49)
Price:
$91.8
Visit
Reviews: 49
(3.7)
|
The camera is not very high quality, you can see enough to back up and it is has a wide eniugh view angle.
I put this camera on the license plate frame of our camper trailer and added a Peak extension cord that lengthened it so it goes past the tongue of the trailer, attaching it to the trailer frame with clips. In our tow vehicle I plug the extension cord into the Bluetooth antenna sender and plug the other wire into a 12 volt plug I wired to it. In the front I have the Bluetooth camera which stays on all the time and gives me a great view of all the traffic behind me or trying to pass, like extending my rear view mirrors!
This was relatively easy to install. The wireless feature eliminates the need to feed wires from the license plate to the front of the dash. The picture quality is excellent. The mount for the video screen limits the placement of the unit.
I reluctantly got this backup cam for my wife for Christmas, because she wanted one. I say reluctantly because I was the one that had to install it and after reading some of the installation woes of some of the reviewers here, I was not eager to do so. Working on vehicles outdoors in the winter is NOT one of my favorite things to do, fortunately the weather was fairly nice two days after Christmas and we had nothing planned. This cam was installed on a 2008 Hyundai Santa Fe and took about an hour. The time would have been cut shorter if I would not have had to research the wiring of the Santa Fe. I had to remove 5 screws for the rear hatch panel and pop it loose. Drill a 1/2 inch hole just behind where the camera was going to mount. I used the grommet supplied and sealed around the grommet and wires with silicon to further weather proof. Tapped into the hot and ground wire for the backup lights using the provided quick splicers ( I will remove those and do a proper splice with solder sometime in the spring). Mounted the transmitter inside the rear hatch with included zip ties. Replaced the panel on the hatch, plugged in the monitor and done. The hardest part is finding a good spot to mount the monitor. So far it seems to be a decent little camera and my wife is thrilled with it. She feels much better knowing she can see what is directly behind her and outside of the area visible by the rear view mirror.
Great product! Took about one hour to install. Works a lot better than i thought.
Loading reviews...
Products you might like